Whether you are launching a new product or working on a new feature, testing your idea before passing it on to the development team is crucial.
There are several ways to test your product with the help of your target users. Amongst others, you can use one of the following user testing techniques: moderated/unmoderated usability testing, focus groups, A/B testing and surveys. In this blog post, I am going to show you my step-by-step process of setting up an unmoderated remote user test using a tool called Maze.
What is remote user testing?
User testing (also Usability testing) is a User Experience research technique which is used to gather insights and feedback from the target users of a given product, in order to improve it and most importantly, to prevent building something that the users do not want or do not know how to navigate.
User tests can be conducted either in person or remotely. In-person user tests usually happen in a form of interviews. The facilitator and the participant are in the same room and can interact with each other. In contrast, remote user testing happens with a help of software and the facilitator and the participant are in two different physical locations. We can further differentiate between moderated and unmoderated remote user testing. The latter means that the facilitator is not present when the user is testing the product or feature.
Remote user tests are performed with a help of a software that records a user's actions and saves them for future analysis.
When is a good idea to conduct remote user tests for your product?
No or hard in-person access to the target audience
If you are having a hard time getting access to your target audience, when in-person interviews is not an option, but you still need the valuable feedback of your users, then you should definitely consider remote user testing.
Time pressure
An important factor in building and scaling an online company is speed. You want to be able to build and break things fast. In order for this to happen, you also need to be in a ready mode for testing. Since in-person interviews are mostly time-consuming, you should absolutely consider remote tests, as they are very flexible when it comes to timing, the user can choose the best time to perform the test themselves. Also, consider this if you target audience has a full calendar ( hint: Business-to-Business products) and there is no other way to fit a product feature test into their busy schedule.
Tight budget
If you are on a budget, then use remote user testing- it is way cheaper than conducting a test in-house. For example, if you use User Testing or Maze, then you'd probably spend anywhere between $ 100 and $500 and solve the majority of your usability problems and get some basic feedback from your target audience.
How to set up and evaluate an unmoderated remote user test using Maze
When setting up a remote user test for a new product at Ergo Digital, I decided to test a new tool called Maze. Maze is a new UX testing tool that offers analytics for InVision and Marvel prototypes. If you 've built a click prototype and you want to conduct a fast unmoderated user testing, then Maze is THE tool to use.
Here's how to conduct a remote user tets with Maze:
Step 1- Create a prototype in InVision or in Marvel.
Once you've signed up for a free account, you can set up a new test within few minutes ( hint: you can only have 1 project if you are on the Free plan, but it's enough to test the software).
A Pre-requisite for testing a prototype is, having a link to either an InVision or a Marvel prototype. Simply copy and paste the link to get started.
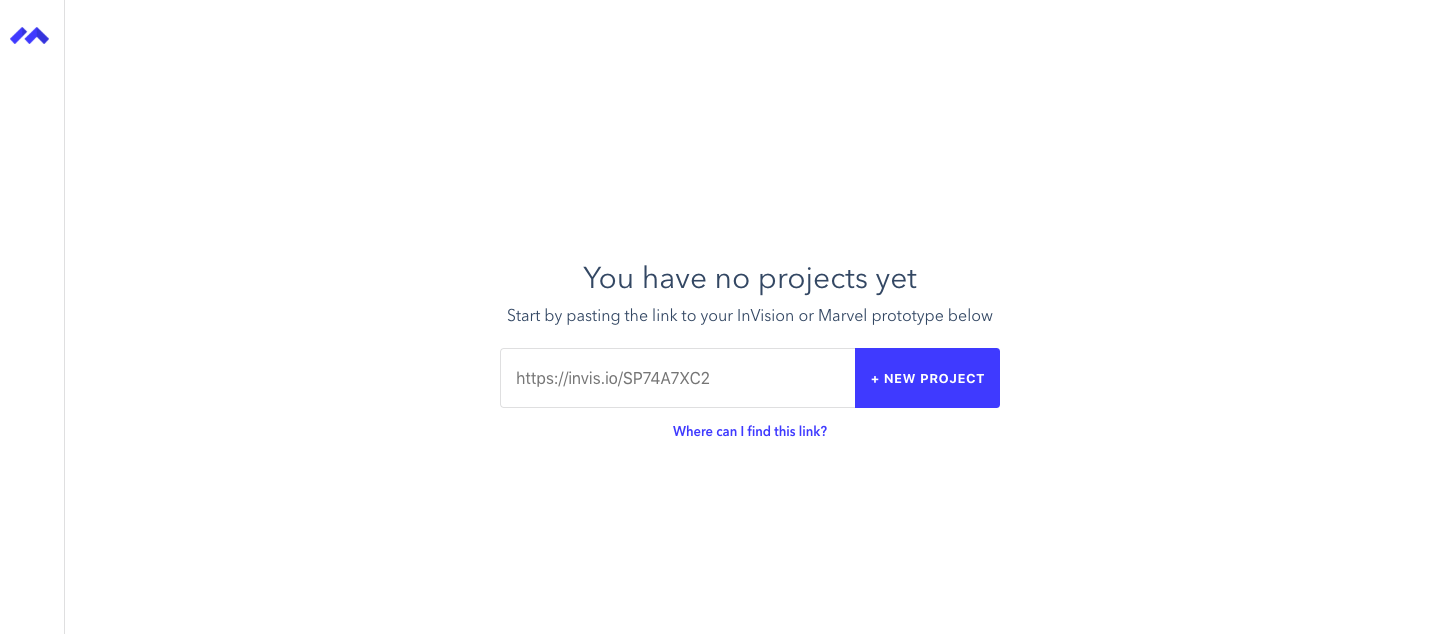
Step 2-Create Your Maze
For each prototype that you import, you can create different Mazes for your users to test. This is great for testing separate user flows within an app or a website. For example, you can easily test the purchasing process of your online shopping app- from finding an item to selecting the right payment method.
Here I'm using a link to a prototype I built for one of my old projects:
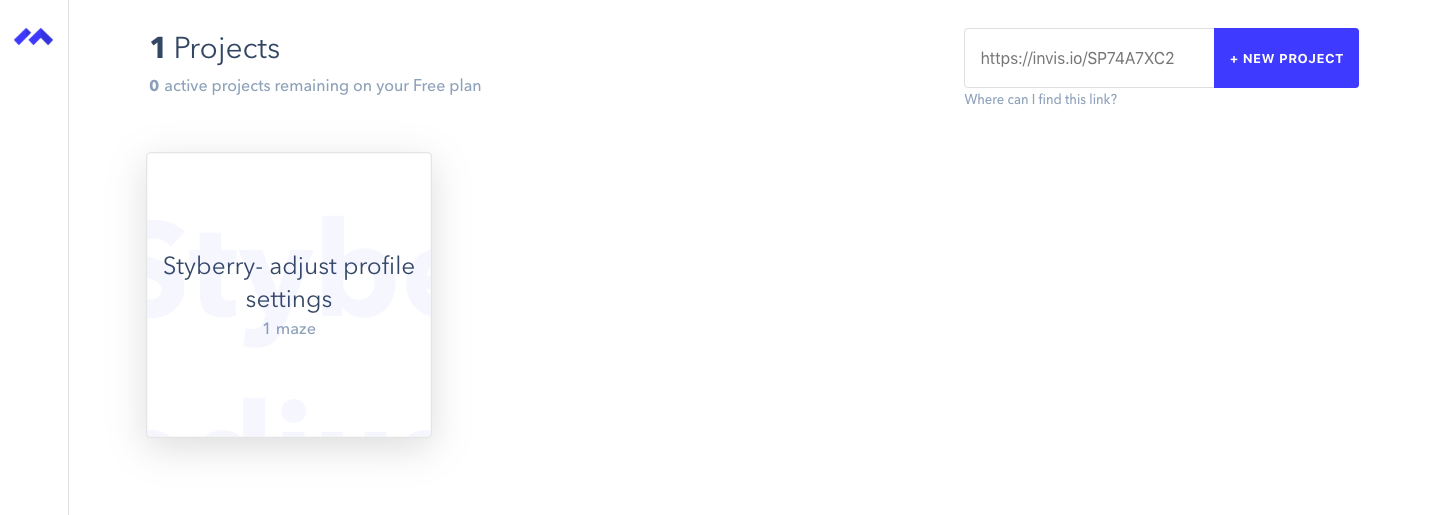
Click on the project in order to continue.
Step 3- Add your Maze
Adding a new Maze prototype is simple! First, you need to add a Mission title. Make sure that it's something short and descriptive since it's visible to the test user. Next, you want to add some instructions in the description. Again, I've tested it and it seems there is a limited number of characters here, so you need to keep it short.
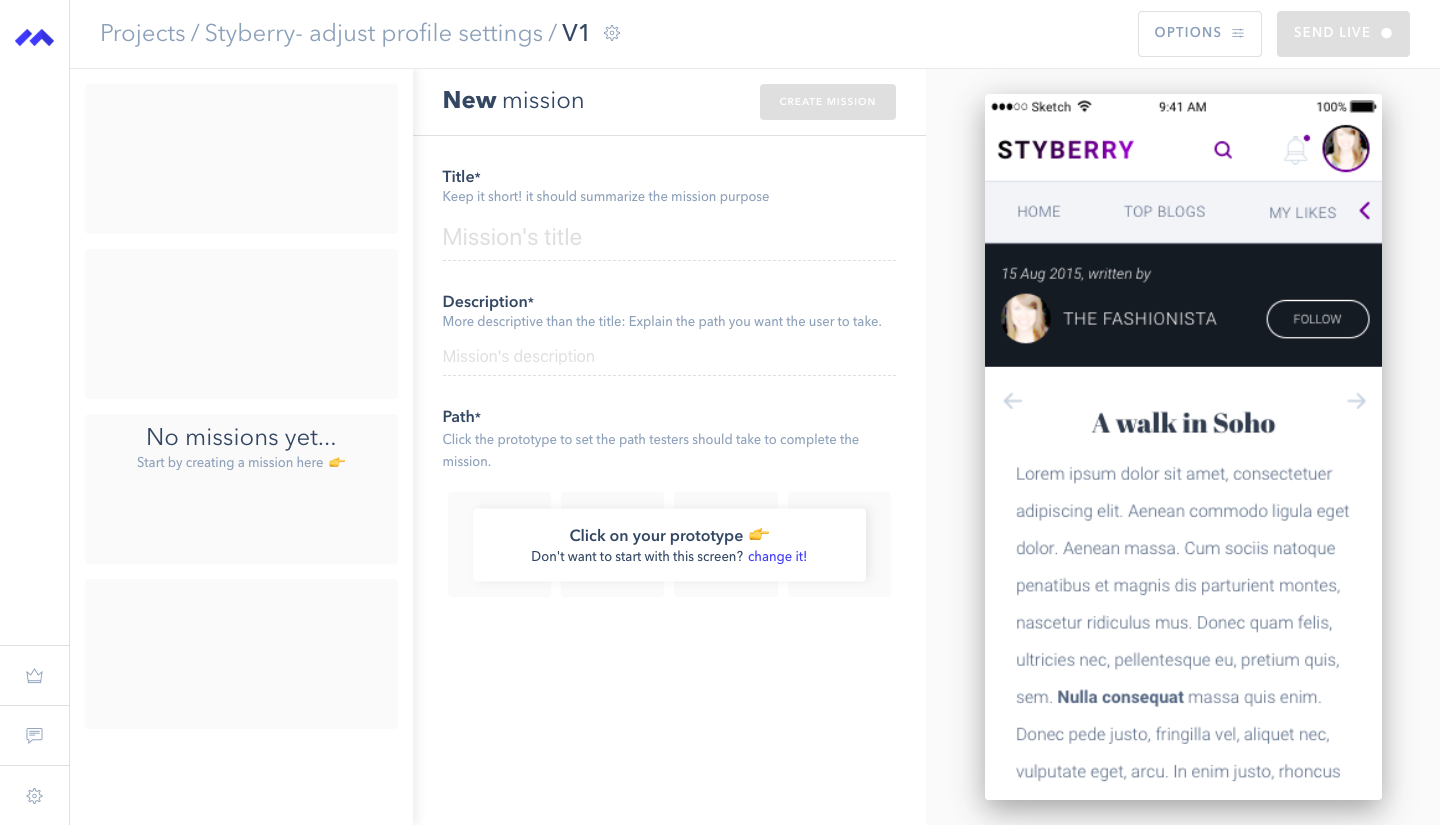
Lastly, the fun part- defining the Path or the user flow.
Start clicking on your prototype, which is displayed on the right side. Maze will record where you have clicked on each screen and store is as a target path. It's worth pointing out that while InVision prototypes have the click area visible (usually in blue), Maze does not show the user where they have to click. And that's a good thing. This way you are testing the usability of your product. If the user is not clicking where they are supposed to or if they cannot find where to click in order to complete the task given, then it's clear that you need to make some adjustments.
Once you've done setting up the user flow, click the "create mission" button. Your mission is now ready to be shared with your users. Be aware that editing your mission is not possible after you publish it live though...

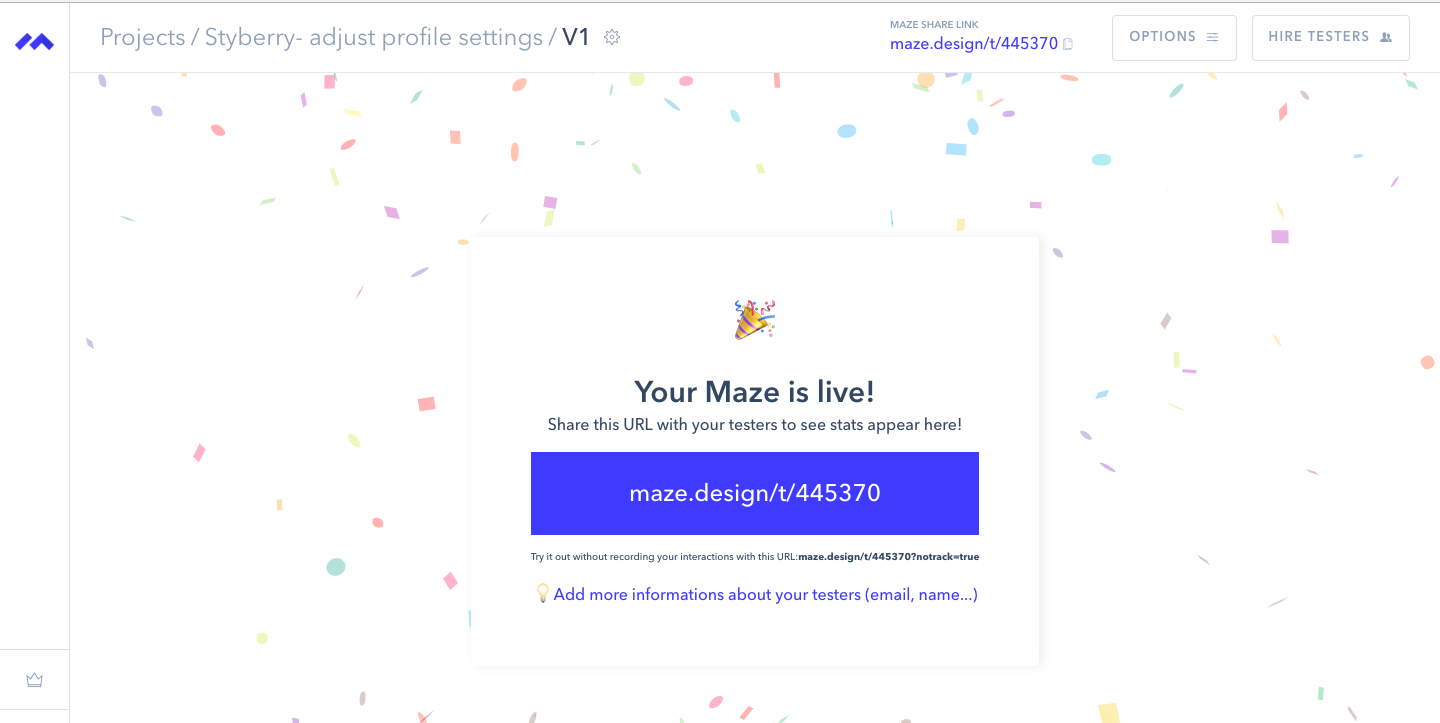
Step 4- Send it Live!
Once you've set up everything, it's time to sit back, relax and launch your Mazes 😎
Similar to InVision, Maze will give you a testing link, which you can send to your testers. Most of the time, you would be testing several flows simultaneously, so I recommend you keep a tidy Excel sheet or similar, where you can record your findings later.
Create an email template to send out to testers
One of the things we did at Ergo Digital IT when we conducted remote user tests, was to create an e-mail template invite with all the instructions and different test scenarios. Given that you have a list of emails to send your Mazes to, all you need to do is create a one-time email template where you replace the name of the person, and click on send. Saves tons of time!
Step 5- Analyze the data
Once you've gathered enough data on your product, pause your Maze and start analyzing it. You can see the bounce rate as well as the user feedback at any time by clicking on your project:
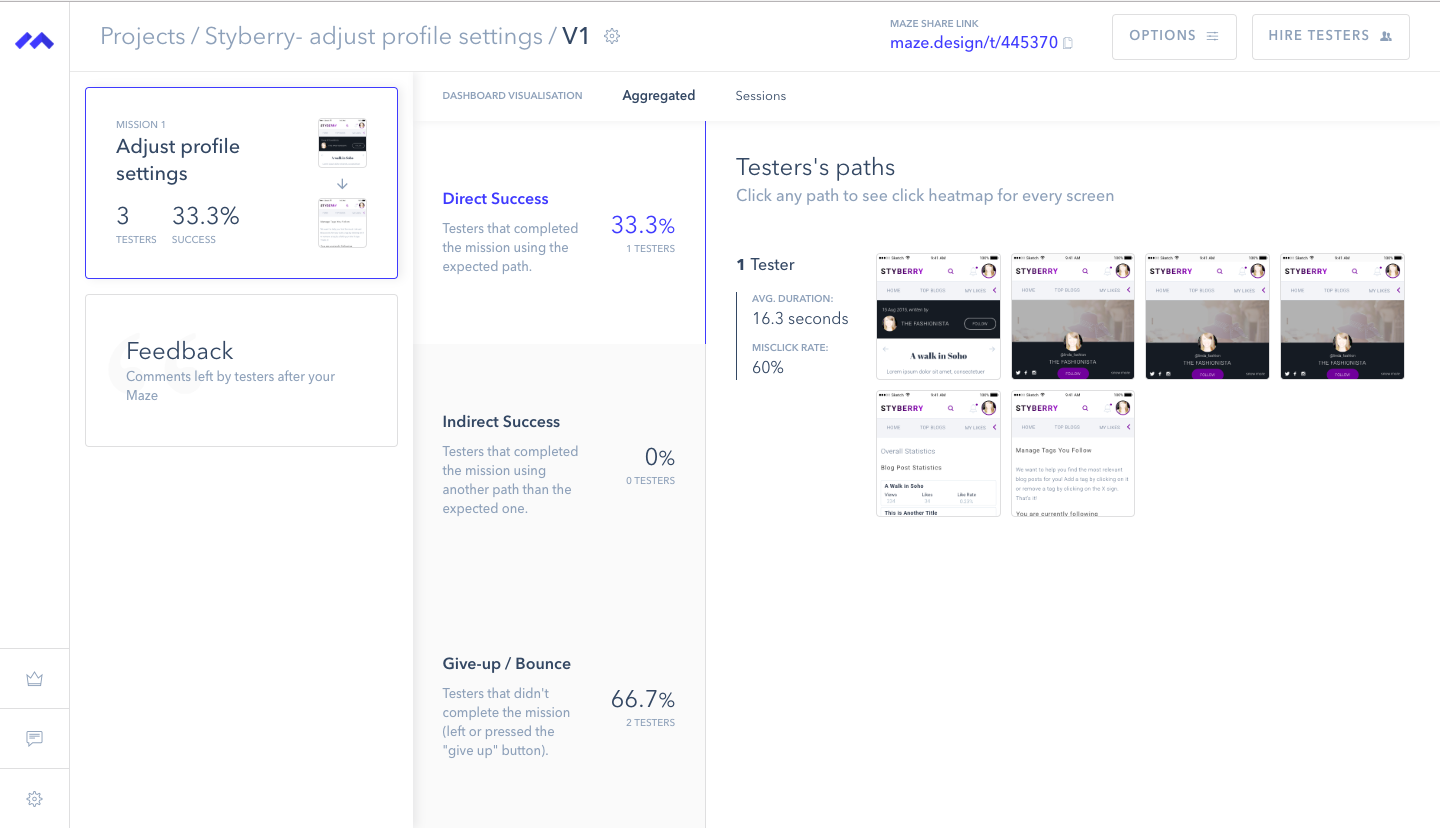
In terms of quantitative data, what Maze actually offers is heatmaps. Heatmaps are simply a visual representation of the user's behavior on a certain page. Heatmaps are great for testing ideas because they give you instant feedback on the user experience of your mockups. Here's how the heatmaps look inside Maze: you can click on each screen and see the statistics:
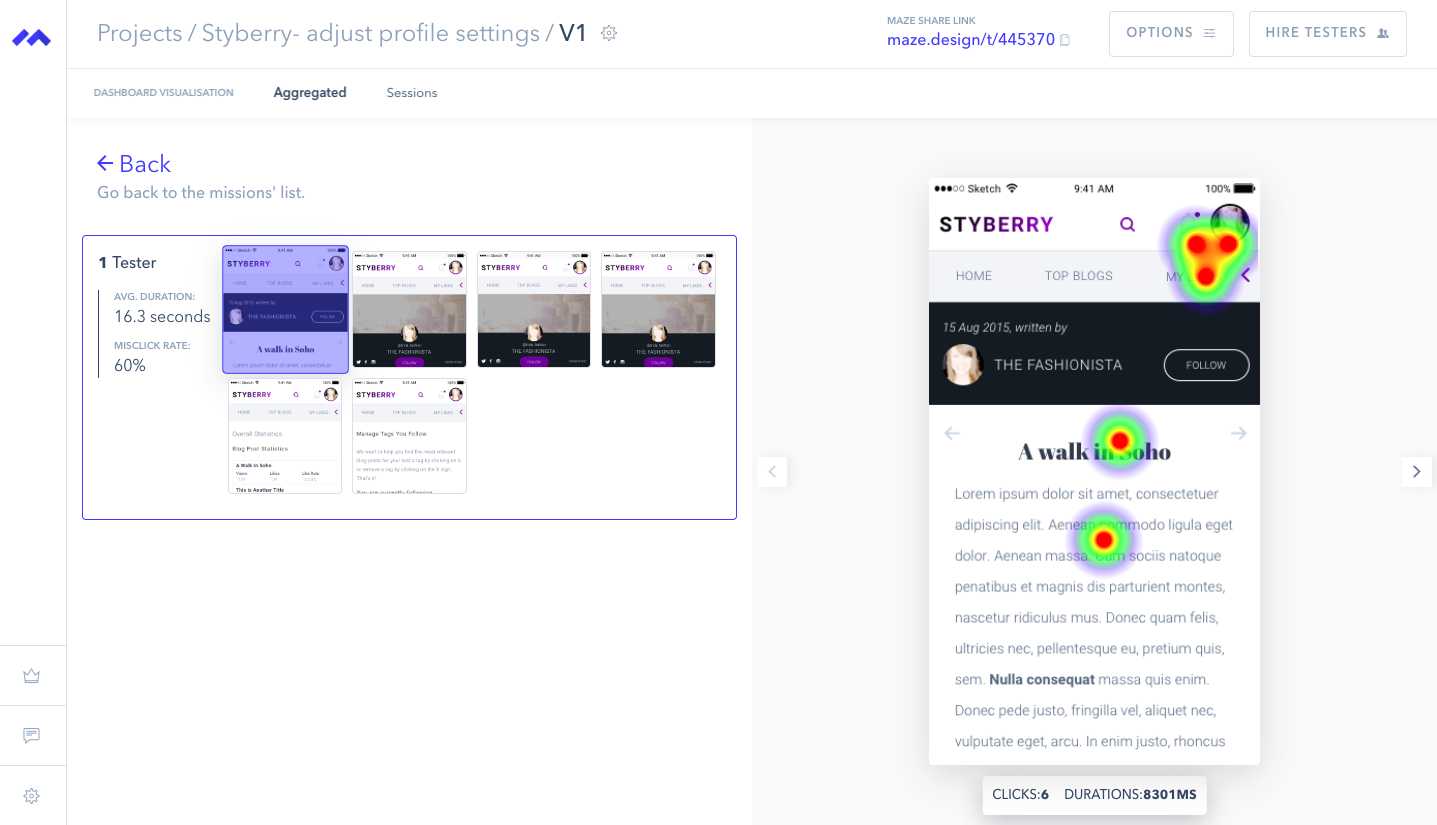
There are, of course, some drawbacks to this type of analytics. The biggest problem with heatmaps is that you need a certain amount of data in order for your results to be accurate. Also, keep in mind that you are tracking user behavior and are able to see where the user clicks but you can never know why they do it.
For more information on heatmaps, read this blog post.
Final Thoughts on Remote User Testing and Gathering Feedback
It's nice to know where people click, but it nicer to know WHY they do it.
Maze does offer the possibility to gather user feedback. The problem is that the user may just click away or close the browser window after completing the Maze, thus leaving you with little to no feedback about your product.
This is frustrating, as you usually need the valuable feedback from the users that were not able to complete the flow and want to know their concerns and suggestions for improvement.
Suggestion: If your bounce rate is higher than 80%, make sure to follow-up with the users and ask them for feedback- either in a written form or better yet-jump on a quick call with them, if possible.
I hope you enjoyed this blog post! Want to receive my content straight into your inbox? Get on special VIP list.
xoxo Iglika


